
You’ve just had your car windows tinted, and it looks fantastic. But then, you notice those annoying bubbles popping up on the surface.
They’re not just an eyesore; they can actually ruin the sleek look you were aiming for. Don’t worry, because you’re not alone, and there’s a solution. Imagine driving with perfectly smooth window tints, enhancing both your car’s appearance and your driving experience.
In this guide, you’ll learn how to get rid of those pesky bubbles yourself. We’ll walk you through the simple steps, giving you the confidence and tools you need. No need to rush to an expert or spend extra money. You can fix this yourself, saving both time and cash. By the end of this article, you’ll have the knowledge to make your window tints bubble-free, ensuring your car looks as good as new. Keep reading to find out how you can transform your vehicle’s appearance today!
Credit: www.conceptwraps.com.au
Causes Of Window Tint Bubbles
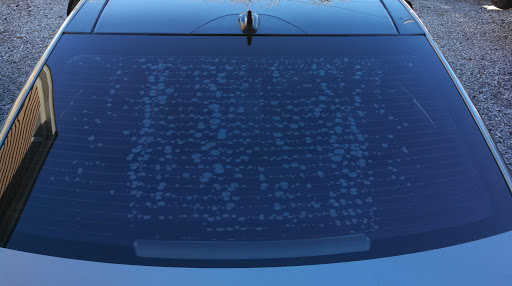
Window tint bubbles can be a frustrating issue for car owners. They not only look unsightly but can also affect visibility. Understanding the causes of window tint bubbles can help prevent them. Let’s explore some common reasons why these bubbles form.
Poor Installation
Poor installation is a major cause of window tint bubbles. Incorrect techniques can trap air, forming bubbles. Skilled professionals use proper tools and methods. This ensures a smooth, bubble-free finish.
Contaminants Under The Tint
Dirt and dust can stick to the glass during installation. These contaminants create obstacles under the tint. Bubbles form around them, ruining the appearance. Proper cleaning before installation is crucial.
Heat Exposure
Heat exposure can cause window tint to expand and contract. This can lead to bubbles forming over time. Parking in shaded areas can help reduce this risk. Quality tints resist heat better, preventing bubbles.
Tools Needed For Repair
Fixing window tint bubbles can seem daunting. But, with the right tools, it’s manageable. Knowing which tools to gather is the first step. This ensures a smooth repair process. Let’s explore the essential and optional tools needed.
Essential Tools
The following tools are necessary for removing window tint bubbles:
- Squeegee: Use this to smooth out the film and remove bubbles.
- Heat Gun: A heat gun softens the adhesive, making it easier to work with.
- Spray Bottle: Fill with soapy water to keep the tint moist and pliable.
- Utility Knife: Trim excess film with precision.
- Lint-Free Cloth: Clean the surface without leaving any residue.
Optional Tools
These tools can make the task easier but aren’t necessary:
- Steamer: Helps loosen the adhesive for easier removal.
- Plastic Scraper: Safely removes stubborn bubbles without scratching.
- Measuring Tape: Ensures accurate cutting of the window film.
- Razor Blade: Useful for precise trimming in tight spaces.
- Gloves: Protects hands from heat and sharp tools.
Having these tools on hand can make the repair process smooth. It also saves time and effort.
Preparation Steps
Fixing window tint bubbles starts with good preparation. This ensures a smooth process. Proper preparation helps achieve a bubble-free finish. It involves cleaning and gathering materials. Let’s explore these steps in detail.
Cleaning The Surface
A clean surface is crucial before starting. Dirt and debris can cause more bubbles. Use a mild soap solution. Gently clean the window surface. Avoid harsh chemicals. They can damage the tint. Rinse with clean water. Pat dry with a microfiber cloth. Ensure no lint remains. This step lays the foundation for the rest.
Gathering Materials
Gather all necessary materials before starting. You’ll need a hairdryer or heat gun. Soft squeegee, safety pin, and a spray bottle filled with soapy water. These are essential tools. Ensure you have a microfiber cloth. It’s used for drying and cleaning. Having everything ready saves time. It makes the process efficient and stress-free.
Removing Small Bubbles
Small bubbles in window tint can be fixed with patience and care. Use a pin to gently pop them, then smooth the surface with a credit card. Ensure the tint is warm to avoid tearing.
Removing small bubbles from window tint can be frustrating. But with patience and the right approach, you can achieve a smooth finish. Small bubbles often appear due to trapped air or moisture. Tackling them quickly prevents long-term issues. Let’s explore effective methods for removing them.Using A Pin
A pin is handy for removing small bubbles. Sterilize the pin first to avoid contamination. Gently pierce the center of the bubble. This allows trapped air to escape. Use a soft cloth to press the bubble outward. Make sure you apply pressure evenly. This ensures the tint remains smooth.Applying Heat
Heat helps in softening the tint. A hairdryer works well for this method. Set the hairdryer to a low heat setting. Hold it a few inches from the tint. Move it in circular motions over the bubbles. This softens the adhesive and allows bubbles to flatten. Be careful not to overheat the tint. Excessive heat can damage it. Both techniques require patience. Practice makes perfect, and soon, your window tint will be bubble-free.Dealing With Large Bubbles
Fixing window tint bubbles can be simple. Carefully pierce the bubble with a small needle. Gently press out the air using a credit card, ensuring a smooth finish.
Dealing with large bubbles in window tint can be both frustrating and unsightly. You might notice these pesky intrusions right after installation, or they can develop over time. If left untreated, they can lead to more significant issues like reduced visibility and even damage to the tint itself. But don’t worry! Tackling these large bubbles is easier than you think, and with the right approach, your windows can look flawless again. ###Lifting The Tint
To start, gently lift the tinted film where the bubble has formed. Use a thin, sharp object like a razor blade to carefully peel back the film. Be cautious not to tear or crease the tint as you do this. Once lifted, spray a mixture of water and a drop of dish soap onto the window surface. This solution will help in reapplying the tint smoothly later. Ensure the area is completely wet before moving to the next step. ###Reapplying The Film
Now, slowly lay the tint back onto the window. Use a squeegee to press the film from the center towards the edges. This action helps push out any air or moisture trapped beneath the film. Work patiently, ensuring you don’t leave any new bubbles. If you notice any stubborn ones, lift the film slightly and reapply. Sometimes, persistence is key to achieving that smooth finish you desire. Have you ever fixed a bubble only to see it return later? This could be due to debris trapped under the tint. Make sure the window is clean before reapplying the film. A microfiber cloth can help remove tiny particles that can cause issues. By addressing large bubbles promptly, you enhance the appearance and longevity of your window tint. Remember, your diligence pays off when you see your windows looking pristine and bubble-free!
Credit: www.youtube.com
Preventing Future Bubbles
Fixing window tint bubbles helps prevent future issues. Start by cleaning the window thoroughly. Use a heat gun to gently warm the tint, then smooth out bubbles with a squeegee. This process ensures a clear, bubble-free finish, maintaining the look and effectiveness of your window tint.
Preventing window tint bubbles helps maintain a smooth finish. It’s crucial for a clear view and long-lasting tint. Proper steps ensure your tint stays bubble-free. Follow these steps for the best results.Proper Installation Techniques
A smooth tint starts with good installation. Clean the window thoroughly before applying tint. Dust and dirt cause bubbles. Use a spray bottle with soapy water to keep the window wet. This allows for easy adjustment of the film. Press the tint film with a squeegee to remove air bubbles. Work from the center outwards. Ensure there are no gaps or overlaps. This ensures the film adheres well.Regular Maintenance
Regular maintenance keeps the tint looking new. Avoid rolling windows down for a few days after installation. This gives the tint time to set. Clean the tinted windows with a gentle cleaner. Avoid harsh chemicals that damage the tint. Soft cloths or microfiber towels work best. They prevent scratches. Check the tint regularly for signs of bubbles. Address them quickly to prevent bigger problems. “`When To Seek Professional Help
Sometimes, fixing window tint bubbles yourself doesn’t work. Persistent bubbles may need a professional’s touch. Seek expert help for a smooth finish.
When window tint bubbles appear, it may seem simple to fix them yourself. Sometimes, though, these bubbles can be stubborn. Knowing when to seek professional help saves time and effort. Professionals can handle complex issues efficiently. They also ensure the tint remains intact. This section will guide you through situations that call for expert intervention.Complex Issues
Some bubbles are tricky. They hide under the surface. If you notice bubbles appearing repeatedly, it could indicate deeper problems. These issues might involve the adhesive used. Professionals have tools to detect and resolve such issues. They ensure the tint is applied smoothly and effectively.Warranty Considerations
Warranty is crucial. Fixing the tint yourself might void it. Professionals are trained to follow warranty guidelines. They use approved methods and materials. This ensures the warranty remains valid. Always check your warranty terms before attempting any DIY fixes. Seeking expert help can keep your warranty intact.
Credit: www.globaltintusa.com
Choosing Quality Tint Materials
Choosing the right tint material is crucial for bubble-free windows. Quality matters. It affects appearance and longevity. Substandard films often lead to bubbles and peeling. Investing in superior materials ensures smooth, lasting results. Let’s explore the types of tint films and benefits of professional-grade tints.
Types Of Tint Films
Tint films vary in material and performance. Dyed films are popular for their cost-effectiveness. They absorb heat and reduce glare but may fade over time. Metalized films reflect heat and provide a shiny look. They are more durable but can interfere with signals. Carbon films are non-reflective and resist fading. They block heat effectively and maintain color. Ceramic films offer top-tier performance. They block UV rays and heat without signal interference. Choosing the right film depends on your needs and budget.
Benefits Of Professional Grade Tint
Professional-grade tints offer superior quality. They are durable and provide better adhesion. This reduces the risk of bubbles. They also offer enhanced UV protection. This helps protect interiors from sun damage. Professional-grade films often come with warranties. This ensures peace of mind and long-term satisfaction. Investing in quality materials saves money in the long run.
Frequently Asked Questions
Can Bubbling Window Tint Be Fixed?
Yes, bubbling window tint can be fixed. Small bubbles often disappear with time. For larger bubbles, gently puncture and smooth them out using a squeegee. If the damage is extensive, consider replacing the tint for best results. Regular maintenance helps prevent future bubbling.
How To Fix Ripples In Window Tint?
To fix ripples in window tint, use a heat gun to gently warm the area. Smooth the tint with a squeegee, working from the center outwards. Ensure no air bubbles remain. If ripples persist, consider professional help for best results.
Keep your work area clean and dust-free.
How To Get Air Out Of Window Tint?
Use a squeegee to push air bubbles towards the edge of the tint. Apply pressure evenly for best results.
Will A Heat Gun Remove Bubbles From Window Tint?
Yes, a heat gun effectively removes bubbles from window tint by softening the film. Use it carefully to avoid damage. Move the heat gun in a sweeping motion and apply gentle pressure on bubbles with a squeegee. Proper technique ensures a smooth finish.
Always follow safety precautions when using a heat gun.
Conclusion
Fixing window tint bubbles can be simple with the right steps. Start with cleaning the surface properly. Then, use a heat gun carefully to smooth out the bubbles. A needle can help release trapped air. Practice patience and precision for best results.
Regular maintenance prevents future bubbles. Remember, a smooth tint enhances your car’s look and comfort. Keep learning and improving your technique. It’s satisfying to see your car looking great again. Try these tips today and enjoy a bubble-free window tint.